
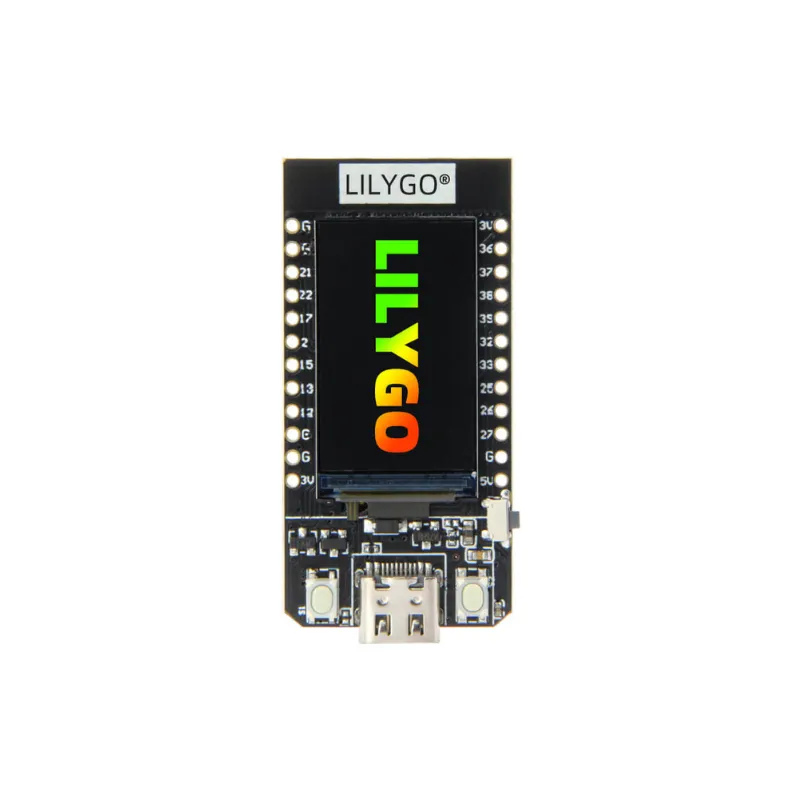
The T-Display is a basic ESP32 development board featuring a built-in LCD display, making it an excellent choice for entry-level programming and IoT development. Designed for beginners and hobbyists, it supports Arduino, MicroPython, and PlatformIO, providing a flexible platform for learning and prototyping.
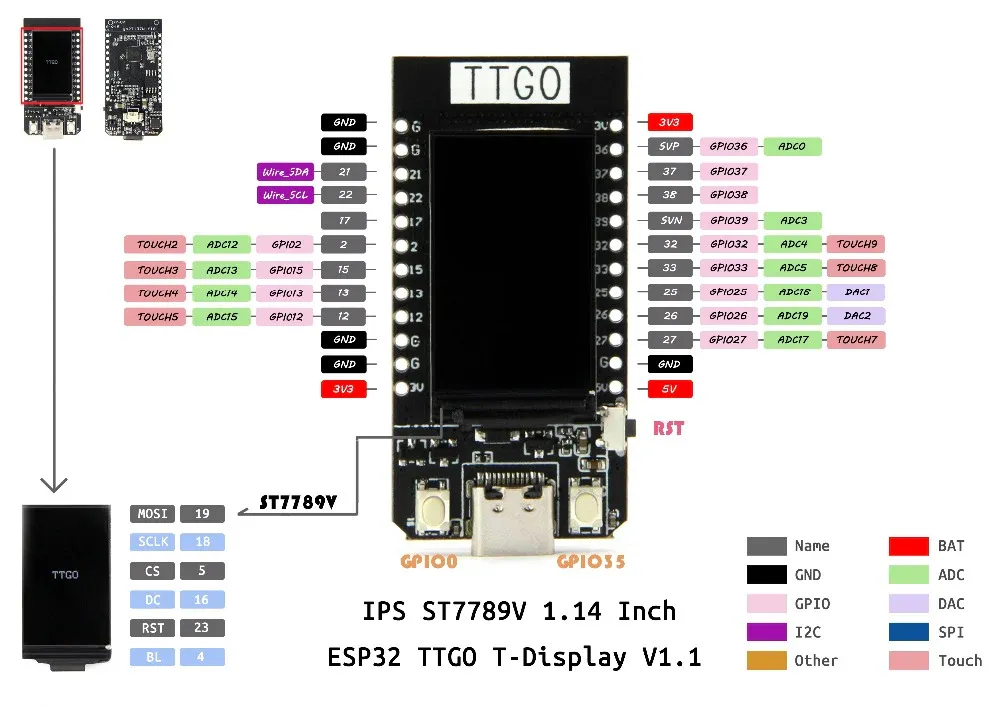
The 1.14-inch ST7789V IPS LCD is a high-resolution full-color TFT display designed for embedded systems, IoT projects, and DIY electronics. With a 135 x 240 resolution and 260 PPI high pixel density, it delivers sharp and vibrant visuals. The 4-wire SPI interface ensures seamless integration with ESP32, Arduino, Raspberry Pi, and other microcontrollers, making it an excellent choice for compact display applications.
Key Features of the T-Display
- ESP32-Powered: Integrated Wi-Fi and Bluetooth connectivity for wireless communication.
- 1.14-inch IPS Display: High-quality TFT screen with 135 x 240 resolution and 260 PPI pixel density for crisp visuals.
- 4-Wire SPI Interface: Compatible with Arduino, ESP32, Raspberry Pi, and other SPI-supported microcontrollers.
- Low Power Consumption: Operates at 3.3V, making it ideal for battery-powered projects.
- ST7789 Driver: Ensures smooth rendering and high-performance graphics for real-time data display.
- Full-Color TFT Screen: Perfect for UI development, sensor readouts, smart wearables, and embedded systems.
- Beginner-Friendly: Supports entry-level programming, making it ideal for students and developers learning embedded systems.
- Versatile Applications: Perfect for IoT projects, smart devices, sensor monitoring, and daily development tasks.
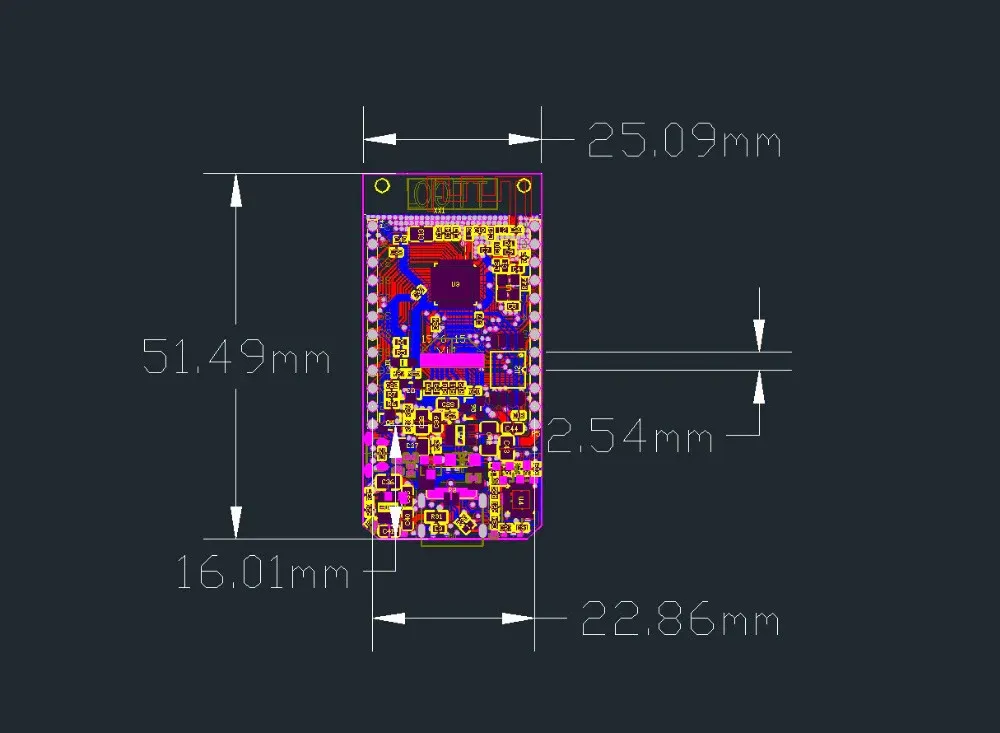
Size of the T-Display
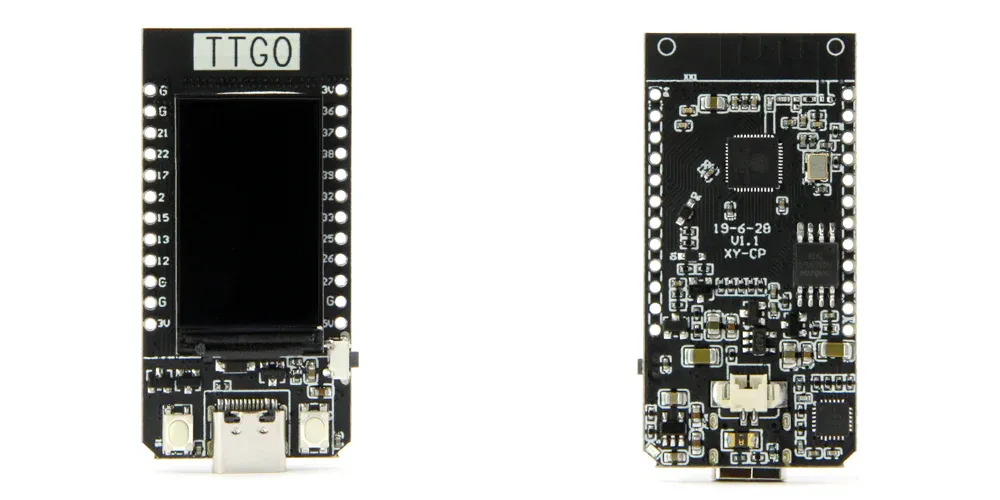
Pin diagram
Technology Support of the T-Display
You can also get more technical support on GitHub
Quick start
- Copy TFT_eSPI to the <C:\Users\Your User Name\Documents\Arduino\libraries> directory
- Open Arduino IDE, find TFT_eSPI in the file, and for example, the T-Display factory test program is located at TFT_eSPI -> FactoryTest, you can also use other sample programs provided by TFT_eSPI 3 In the Arduino IDE tool options, select the development board ESP32 Dev Module, select Disable in the PSRAM option, select 4MB in the Flash Size option, Other keep the default
- Select the corresponding serial port. If you are not sure, please remove all the serial ports, leaving the board in the USB connection state, just select that one
- Finally, click upload, the right arrow next to the tick
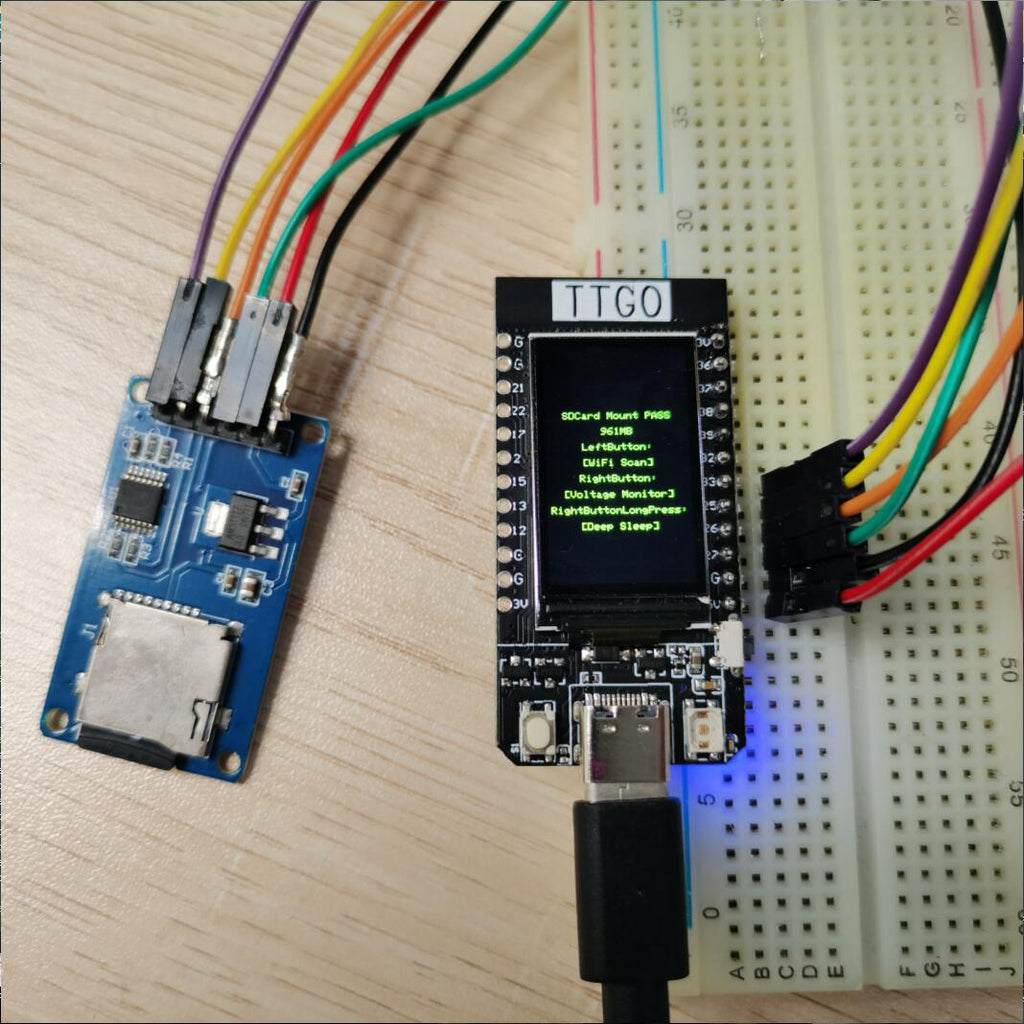
SD card connection
Demonstrate how to use the second SPI device, using the SD card as a demonstration device
| Name | V18 |
| TFT Driver | ST7789 |
| TFT_MIS | N/A |
| TFT_MOSI | 19 |
| TFT_SCLK | 18 |
| TFT_CS | 5 |
| TFT_DC | 16 |
| TFT_RST | N/A |
| TFT_BL | 4 |
| I2C_SDA | 21 |
| I2C_SCL | 22 |
| ADC_IN | 34 |
| BUTTON1 | 35 |
| BUTTON2 | 0 |
| ADC Power | 14 |
Certificate
Has passed CE/ FCC/ UKCA/ MIC certification
(LILYGO exclusive; unauthorized use is prohibited, otherwise, legal responsibility will be pursued.)
If necessary, please refer to our certification page
Reviews
There are no reviews yet.